How to fix black screen problems on Windows 10
A black screen is one of the most difficult problems to resolve in Windows 10 since it does not provide an error number or message that you can use to determine the root cause and swiftly resolve it. Although a black screen might appear due to a number of causes, it is most often caused by a graphics driver or compatibility issues with a new feature update. That might also occur if the machine installs a corrupt update.
There might also be a hardware issue with the video adapter, display, or physical connection. Whatever the cause, Windows 10 offers several ways to check and resolve this issue, whether you have access to the desktop or the system has failed to boot properly.
-
Check for connection issues
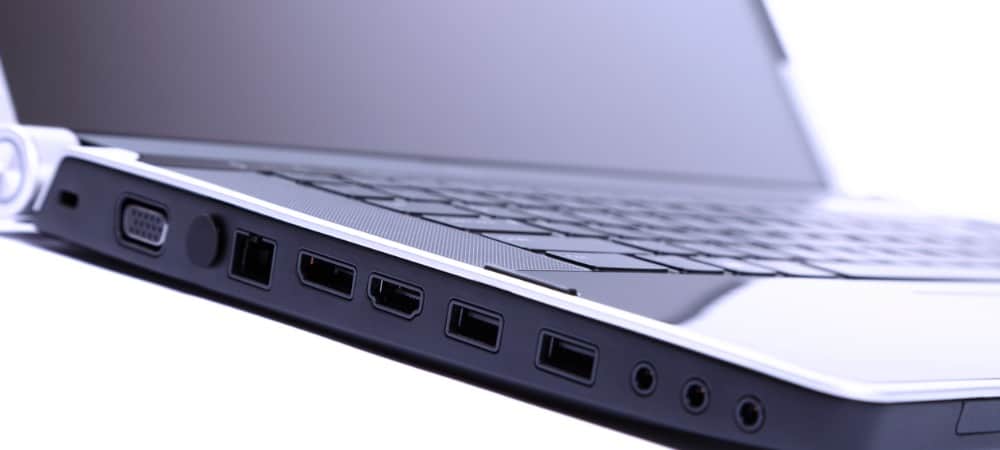
If the problem starts before logging into Windows 10, there is most likely a problem with the computer’s connection to the display. You may address this problem by double-checking the physical connection, order to make sure that both ends of the video signal cable are properly plugged in the correct in and out ports.
Shaking the mouse and disconnecting and reconnecting the video cord might also help wake up the display. While it may be clear to many, review the monitor to confirm it is receiving electricity. (For more particular information, consult your manufacturer’s support website.)
If the device has both a standalone and integrated graphics card, try switching to the integrated video card to see whether the standalone card is the issue. If you recently upgraded the UEFI (Unified Extensible Firmware Interface) or BIOS (Basic Input/Output System), this might occasionally disable the discrete graphics card, which can only be enabled again by updating the motherboard firmware.
To address the black screen issue when connected to an external monitor, access the control panel on the display and boost the brightness. It’s also a good idea to double-check that the monitor is receiving the right input. (For specifics, you may need to see the manufacturer’s support page.) You can also try connecting the monitor to a different computer or using a different video cable to see whether you have a faulty display, graphics card, or cable.
-
Display detection
A black screen may also occur if Windows 10 loses its connection to the display. The keyboard shortcut “Windows key + Ctrl + Shift + B” will restart the video driver and reconnect to the monitor. With certain devices, you can wake up the screen by pressing the volume up and volume down keys three times in a row (quickly).
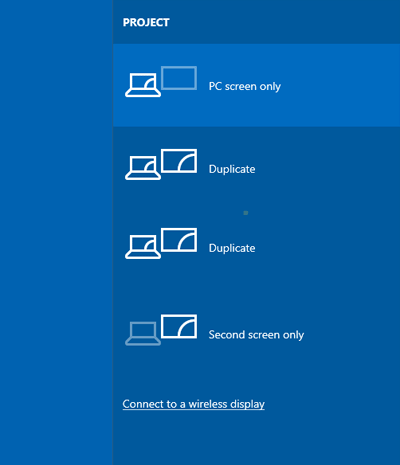
When you do the wake action, you will hear a beep and see movement on the screen, indicating that Windows 10 is capable of responding to the order and is attempting to establish communication. Instead, you may launch the “Project” flyout menu by pressing the “Windows key + P” keyboard shortcut.
Then press the P key again, followed by the Enter key, to cycle through the various display modes and check whether the black screen disappears. (You will need to repeat the procedures four times to go through all of the different modes.)
-
Unplug non-essential devices
The blank screen or black screen with spinning dots during startup might be caused by connected peripherals. Generally, spinning dots at startup signify that an update is being installed and that you should wait a few seconds. But, if it takes a lengthy time, there might be a hardware compatibility issue.
You may resolve this issue by unplugging all accessories from the computer, including printers, cameras, removable discs, Bluetooth, the docking station, and other USB devices. Restart the computer after disconnecting the peripherals, and if it returns to normal, the problem is most likely one of the devices. You can narrow down which component is causing the problem by reconnecting them one at a time until you locate the culprit.
Restart Windows Explorer on your System
Restarting the Windows Explorer process on your Windows 10 machine is another way to resolve the Windows 10 Black Screen after Login issue.
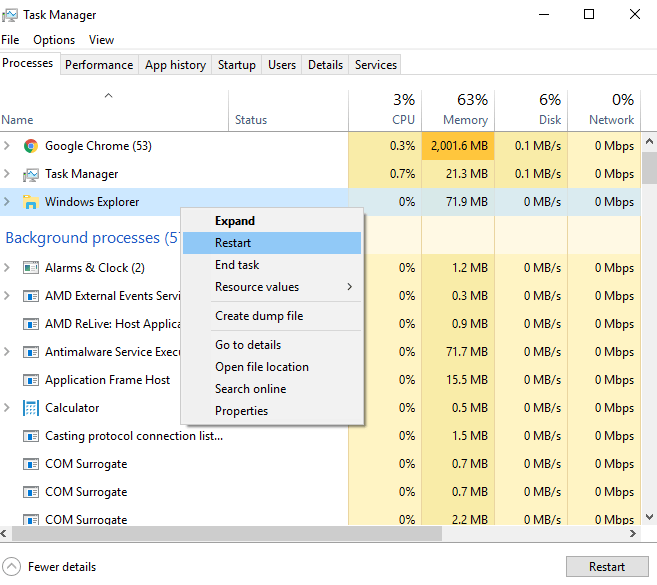
Please bear in mind that you may only use this approach if the pointer and sections of the display are both visible on the screen. The following are the steps you must take to restart Windows Explorer:
- Press the Delete key + Alt key + Ctrl key on your keyboard.
- From the menu that appears, click on “Task Manager”.
- A new task manager window will now open.
- Switch to the “Process” tab.
- Within this tab, find the “Windows Explorer” process. Using your mouse, right-click on this option.
- A drop-down menu will now appear and from this menu, click on “Restart”.
The Windows Explorer task will restart on your system, and this should resolve the Windows 10 Black Screen after Login issue.
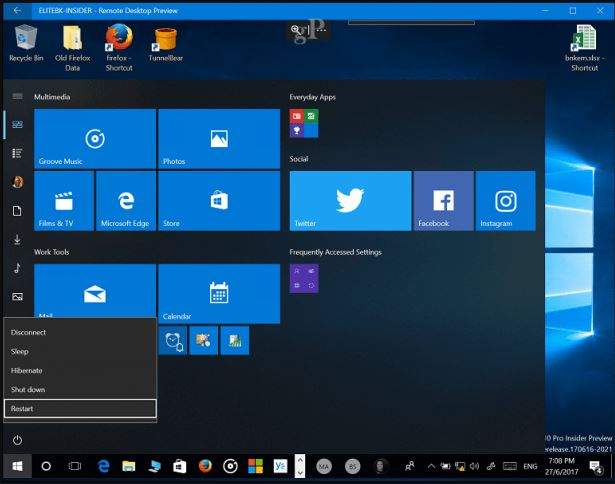
Restart Your System
Another simple solution to resolve the Windows 10 black screen after login bug is to restart your computer. Restarting your system will restart any defective processes, services, or applications that may have been the source of the issue in the first place.
Before restarting your system, save any work you were doing so that you do not lose any progress once the system restarts.
Boot into Safe Mode
If you do not have access to the desktop, you can boot in safe mode using the “Advanced startup” options to troubleshoot and resolve the black screen issue. To access the Windows 10 advanced options, use these steps:
- First of all, power OFF your device.
- Now, press the power button to turn your device ON.
- As soon as you see the Windows logo or manufacturer logo (whichever comes first), press the power button again and turn OFF your device.
- Repeat step 2 and step 3 two more times.
- The last time your system boots up, do not press any key.
- You will now enter the winRE (Windows Recovery Environment) mode.
- Within the winRE menu, click on “Troubleshoot”.
- Then click on “Advanced Options”.
- Now, click on “Startup Settings”.
- And in the new window that appears, click on the “Restart” button located in the bottom right side of the display.
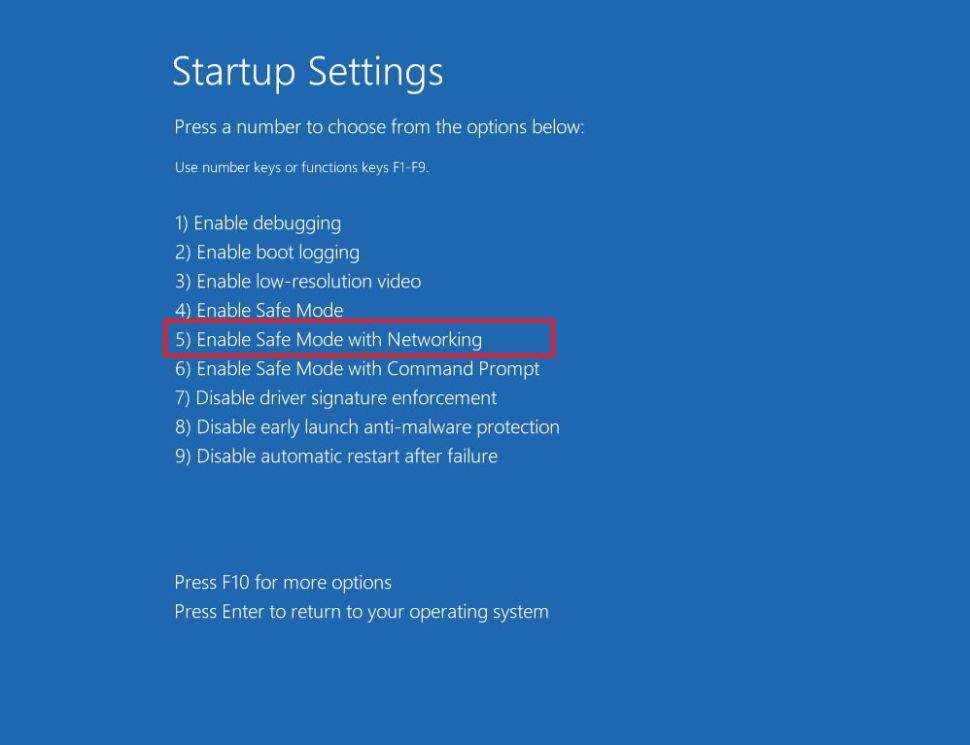
- After the restart, you will see a list of options — Press F5 to select the “Safe Mode with Networking” option.
And that is it. Your system has now successfully booted into Safe Mode.
Rollback Display Drivers to the Previous Version
As a result, you can attempt reverting the display drivers installed on your system to an older version to repair the issue. The steps below will show you how to simply rollback display drivers on Windows 10.
- Press the Windows key + “R” key on your keyboard to launch the Run window.
- When the Run window opens up, type in “devmgmt — Msc” and press Enter.
- The Device Manager window will now open.
- Within the devices listed in the left side of the window, look for “Display Adapters” and expand this option.
- Right-click using your mouse on each driver that appears inside Display Adapters section.
- From the drop-down menu that now appears, click on “Properties”.
- When the Properties window launches, switch to the “Driver” tab from the top.
- Click on the option that says “Roll Back Driver”.
- Click on “OK”.
Reinstall the Display Drivers
If rolling back display drivers does not address the Windows 10 Black Screen after Login issue, reinstalling the display drivers on your PC should, and here’s how.
- Press the Windows key + “R” key on your keyboard.
- Type in “devmgmt.msc” (without quotes) and press Enter.
- Within the Device Manager window that opens up, find “Display Adapters” and expand the option.
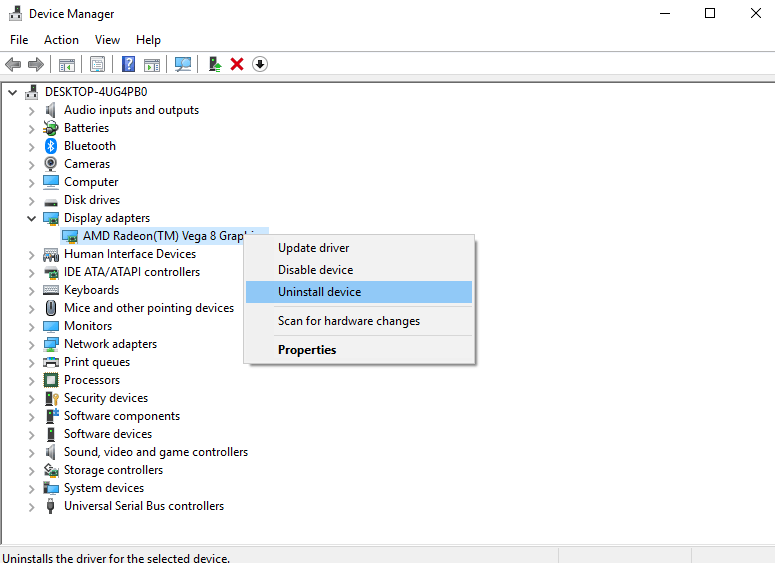
- Find the display driver installed on your device within the expanded Display Adapters option and using your mouse, right-click on the same.
- Click on the option that says “Uninstall Device”.
- In the pop-up box that appears, tick the “Delete the driver software for this device” option and then click on the “Uninstall” button.
- Restart your device.
After uninstalling and rebooting your system, the newest version of the display drivers should be installed on your device, resolving the issue.
Uninstall any Third-Party Antivirus Software
Third-party antivirus software installed on your Windows 10 PC might potentially cause the Windows 10 Black Screen after Login issue in rare situations. To see if the antivirus software installed on your machine is causing the problem, temporarily uninstall it.
If the Windows 10 Black Screen after Login issue is addressed, try installing another third-party antivirus programme. Aside from antivirus software, if you recently installed any other third-party software prior to the Windows 10 Black Screen after Login issue, consider deleting that programme as well.
Uninstall any Recent Windows Update
To remove the most current Windows update, first boot your system into Safe Mode by following the instructions outlined in section 5 above.
After entering Safe Mode, proceed with the procedures below to delete any recently installed Windows updates on your PC.
- Click on the search bar present in the bottom left side of the taskbar, and search for “Settings”.
- From within the search results, click on the Settings app.
- When the Settings window launches, click on “Update & Security”.
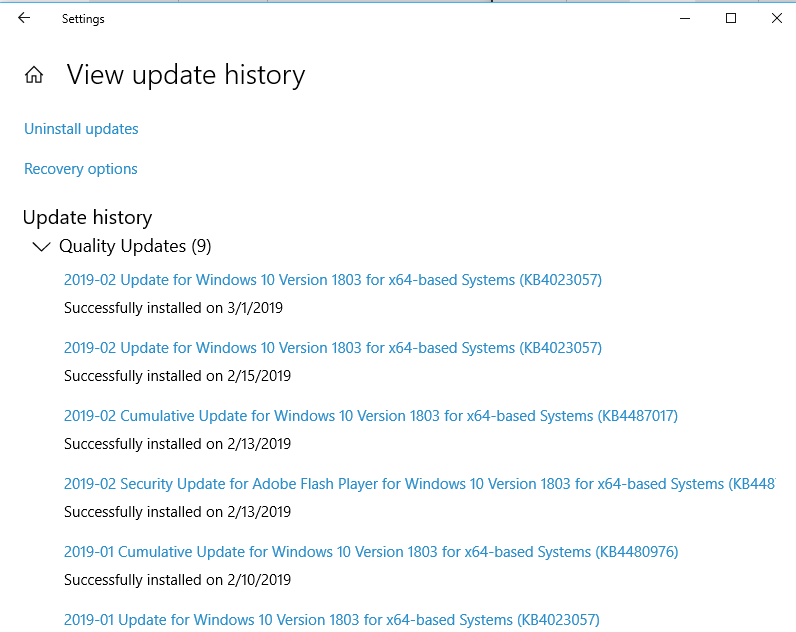
- Now, click on “Windows Update”, and then on “View Your Update History”.
- You then have to click on “Uninstall Updates” and then select the recent update you wish to uninstall from your system.
- Finally, click on the “Uninstall” button.
Recommended content
RODC Installation Guide- Step by step guide to install read only domain controller
RODC Filtered Attribute Set
Installing and configuring a RODC in Windows Server-2012
How to find the GUID of Domain Controller
Understanding Group Policy Preferences
Group Policy Verification Tool GPOTool Exe
Group Policy Health Check on Specific Domain Controller
Netlogon Folder in Active Directory
Custom Attributes in Active Directory
Tombstone Lifetime of My Active Directory Forest
Computers AD Site From the Command Line
Active Directory Database Integrity
Disabling and Enabling the Outbound Replication
DFS Replication Service Stopped Replication
Strict Replication Consistency
The replication operation failed because of a schema mismatch between the servers involved
Troubleshooting ad replication error 8418 the replication operation failed because of a schema mismatch between the servers
Replication information in txt file
Repadmin Replsummary
Enabling the outbound replication
Guys please don’t forget to like and share the post.Also join our WindowsTechno Community and where you can post your queries/doubts and our experts will address them .
You can also share the feedback on below windows techno email id.
If you have any questions feel free to contact us on admin@windowstechno.com also follow us on facebook@windowstechno to get updates about new blog posts.

